Lecture 18
Designing Experiments

ABD 3e Chapter 14

Chris Merkord

Learning Objectives

  • Distinguish between association and causation and explain why observational studies cannot establish causation
  • Define confounding and explain how it biases inference
  • Describe how controls, random assignment, and blinding reduce bias in experiments
  • Identify experimental units and distinguish true replication from pseudoreplication
  • Explain how replication, balance, and blocking reduce sampling error and improve precision
  • Interpret factorial designs and explain how interactions between factors arise
  • Describe how matching and adjustment reduce confounding in observational studies
  • Explain how sample size is chosen to achieve desired precision or statistical power

Experiments

Observations Are Not Enough

  • Observational studies
    • Reveal patterns in real-world data
    • Researchers observe and measure variables as they naturally occur
  • But patterns alone do not tell us why they occur
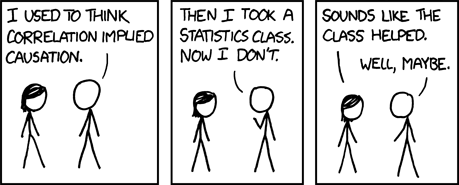
  • Association: two variables change together
  • Causation: a change in one variable directly produces a change in another
  • Multiple explanations can produce the same association
  • Association does not imply causation
Figure 1: Correlation. Image: XKCD (CC BY-NC 2.5)

Why Causal Inference Is Hard

  • Confounding: a third variable influences both variables
  • Directionality: cause and effect can be reversed
  • These problems cannot be resolved with more data alone
  • We need a way to isolate the effect of a single factor → experiments
Triangle diagram showing “In the summer…” at the top with arrows pointing to “ice cream” and “drowning deaths.” A crossed-out arrow between ice cream and drowning deaths indicates no direct causal relationship.
Figure 2: Confounding example: a third factor (summer conditions) increases both ice cream consumption and drowning deaths, creating a misleading association without a direct causal link.

Example: When Observational Studies Mislead

  • Observational studies suggested that hormone replacement therapy (HRT) reduced heart disease risk in women (Stamfer et al. 1991 New England J Med)

  • Women taking HRT had lower rates of heart disease

  • Conclusion (at the time): HRT protects against heart disease

Black-and-white table of cardiovascular disease outcomes by hormone use with colored annotations. A magenta box surrounds the "RR (95% CI)" column header. Blue boxes highlight RR values of 1.0 for the no hormone use group. Orange boxes highlight lower RR values for current hormone users across outcomes, indicating an apparent protective association.
Figure 3: Annotated table from Postmenopausal estrogen therapy and cardiovascular disease showing relative risk (RR) estimates for cardiovascular outcomes by hormone use. The magenta box highlights the RR column label, blue boxes mark the reference group (no hormone use, RR = 1.0), and orange boxes highlight reduced RR estimates among current hormone users in the observational data (Stamfer et al. 1991 New England J Med).

What Was the Problem?

  • Women who chose HRT differed in important ways:
    • Higher socioeconomic status
    • Better access to healthcare
    • Healthier lifestyles overall
  • These differences (confounders) also reduce heart disease risk

What Happened in an Experiment?

  • A randomized trial (Women’s Health Initiative) assigned HRT randomly

  • Result: HRT did not reduce heart disease risk (and increased some risks)

  • The original association was due to confounding, not causation

Figure 4: Kaplan–Meier Estimates of Cumulative Hazard Rates of CHD (Manson et al. 2003 New England J Med) showing similar rate of chronic hearth disease (CHD) among control and treatment groups.

What Is an Experiment?

  • A study where researchers actively impose conditions on a system
  • Researchers assign different conditions (treatments) to experimental units
  • Outcomes are then compared across those conditions
  • This allows us to isolate the effect of a specific factor

Why Experiments Work

  • Experiments are designed to support causal inference
  • By controlling how conditions are assigned, we reduce alternative explanations
  • Properly designed experiments break the link between confounders and treatment
  • Differences in outcomes can be attributed to the treatment

Key Idea

  • Observational studies measure what already exists
  • Experiments create conditions for comparison
  • This is what allows us to move from association → causation

Eliminating Bias

Be Wary of Bias in Your Design

  • Biased experiments produce biased conclusions
  • They tell you about your design, not the real world
  • Bias must be addressed before data are collected
    • It cannot be fixed afterward
  • Large \(n\) does not solve bias
    • It can make biased results more convincing
Two target diagrams side by side. In both, individual points represent sample estimates and the bullseye represents the true population value. The first target shows points widely scattered around the center, indicating sampling error or imprecision. The second shows a tight cluster of points located away from the center, indicating systematic error or bias.
Figure 5: Comparison of sampling error and systematic error: each point represents a sample estimate, and the center of the target represents the true population value. Imprecision produces a wide spread of sample estimates centered on the truth, whereas bias produces tightly clustered estimates that are consistently offset from the truth.

Design Features That Reduce Bias

  • Three core strategies:
    1. Controls
      • Provide a baseline for comparison
    2. Random assignment
      • Breaks the link between confounders and treatment
    3. Blinding
      • Prevents subjects and researchers from influencing outcomes

Eliminating Bias: Strategy 1 — Use Controls

  • A control group provides a baseline for comparison
  • Control units are treated as similarly as possible to treatment units
    • Except for the treatment itself
  • This allows us to isolate the effect of the treatment
  • Without a control, we cannot determine cause and effect

What Makes a Good Control?

  • A good control matches the treatment group in all relevant ways
  • The only systematic difference should be the treatment
  • Poor controls introduce new differences (new confounding)
  • Doing nothing is not always an appropriate control

Control Example: Placebo

  • Outcomes can change simply because a treatment is given

    A placebo mimics the treatment without an active ingredient

    Good placebo: indistinguishable from the treatment

    Bad placebo: differs in noticeable ways (e.g., taste, side effects)

Side-by-side realistic images of the same man smiling while being given a pill. In one panel he receives a plain white pill (placebo), and in the other a colored capsule (drug). His expression is similarly positive in both, indicating a comparable response regardless of treatment.
Figure 6: Illustration of the placebo effect: a participant shows a positive response whether receiving an active drug or a placebo, demonstrating how expectations can produce similar perceived and reported outcomes in both groups.

Why Controls? Example: Independent Recovery

  • People often seek treatment at their worst.

  • Therefore, people often see their doctor when they are on their way to recovery.

  • To measure the effects of a new therapy, we need a comparable control group.

Eliminating Bias: Strategy 2 — Random Assignment

  • Random assignment: assign treatments to units by chance
  • This breaks the link between confounders and treatment
  • Known and unknown differences are balanced on average across groups
  • Prevents systematic differences between groups

Why Random Assignment Matters

  • Without randomization, group differences can reflect confounding
  • Non-random assignment can create bias
  • Example: assign treatment by last name
    • May group family members or cultural backgrounds together
    • Creates systematic differences between groups
  • Randomization prevents these patterns

How to randomly assign

  • Identify the experimental units
  • Assign treatments using a random process
  • Goal: each unit has an equal chance of receiving each treatment
  • In practice:
    • Use a random number generator
    • Use software (e.g., R)
library(tidyverse)
tibble(id = 1:10) |>
  mutate(
    treatment = sample(
      x = c("control", "treatment"),
      size = n(),
      replace = TRUE
    )
  )
1
Create a tibble (data frame) with one variable id with values of 1 through 10
2
Modify the variables in the tibble
3
Add a new treatment variable using the sample function, which randomly draws values
4
The values should consist of either control or treatment
5
n() ensures the number of values in the sample matches the number of rows in the tibble
6
replace=TRUE ensures true random assignment (which means it allows unequal counts)
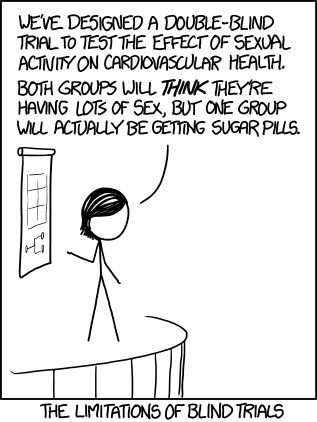
Figure 7: Illustration of the results of random assignment.

Results of random assignment

  • Randomization does not eliminate confounders
  • It removes systematic bias by breaking their association with treatment
  • Remaining differences are due to chance (sampling error)

Eliminating Bias: Strategy 3 — Blinding

  • Blinding: keeping participants and/or researchers unaware of treatment assignment
  • Prevents expectations from influencing outcomes
    • Participants may respond differently if they know their treatment
    • Researchers may treat or measure subjects differently
  • Reduces bias introduced during data collection

Types of Blinding

  • Single-blind: participants do not know their treatment
    • Prevents subject expectations from influencing outcomes
  • Double-blind: neither participants nor researchers know
    • Prevents both subject and researcher bias
  • Stronger blinding → less opportunity for bias
A professional illustration showing a female researcher with black hair in a ponytail and a male participant seated at a table with pill and placebo bottles. Above, two labeled panels compare designs: under “Single Blind,” only the participant is blindfolded; under “Double Blind,” both the participant and researcher are blindfolded.
Figure 8: Comparison of single-blind and double-blind study designs: in a single-blind study, the participant is unaware of treatment assignment, whereas in a double-blind study, both the participant and the researcher are unaware.

Why Blinding Matters

  • Knowledge of treatment can influence:
    • Behavior
    • Reporting of symptoms
    • Measurement of outcomes
  • Unblinded studies often show larger effects
    • These may reflect bias, not true treatment effects
A realistic image of a woman with a frustrated expression, looking off to the side. A thought bubble above her head reads “No wonder I feel bad…” with a placebo symbol, indicating she believes she received a placebo and is interpreting and reporting her symptoms accordingly.
Figure 9: Illustration of lack of blinding: a participant believes they received a placebo and attributes their symptoms to it, showing how expectations can influence both perceived and reported outcomes.

Blinding in Practice

  • Blinding requires careful design

    • Treatments must be indistinguishable
  • Placebos are often used to maintain blinding

  • If blinding fails, bias can re-enter the study

Figure 10: The limitations of blind trials are apparent when treatments are not indistinguishable. Image: XKCD (CC BY-NC 2.5)

Sampling Error

Reducing sampling error improves precision and power

  • Even unbiased experiments have variability among individuals (“noise”)
  • This variability creates sampling error in estimates
  • Sampling error reduces:
    • Precision of estimates
    • Power to detect treatment effects

Holding conditions constant reduces noise but limits generality

  • Reduce noise by keeping conditions constant:
    • Environment (e.g., temperature, humidity)
    • Participant characteristics (e.g., age, sex, genotype)
  • Tradeoff:
    • More control → less variability
    • But results may not generalize broadly

Overly narrow conditions can create bias in applicability

  • Restricting study populations limits who results apply to
  • Example:
    • Many clinical trials historically included only men
    • Results were applied broadly, including to women
  • Design decisions affect external validity

Key design strategies reduce sampling error

  • Key design strategies:

    1. Replication

    2. Balance

    3. Blocking

    4. Using extreme treatments

  • Goal: reduce noise without sacrificing generality

Replication is essential to separate signal from noise

  • Replication: applying each treatment to multiple experimental units
  • Without replication:
    • Cannot distinguish treatment effects from random variation
  • More replication:
    • More information
    • Better estimates
    • Higher power to detect real effects

Replication depends on independent experimental units

  • Replicates must be independent units
  • Experimental unit:
    • The unit assigned a treatment independently
  • Examples:
    • Individual organism (if assigned independently)
    • Group units: plot, cage, household, petri dish
  • Key rule:
    • Individuals within the same unit are not independent

Replication is not just “more individuals”

  • Multiple organisms ≠ multiple replicates
  • If organisms share the same environment:
    • They are more similar to each other
    • They count as one replicate
  • Must identify the correct experimental unit:
    • Critical for design and analysis

Example: Which designs are truly replicated?

  • Two growth chambers:
    • Control vs Treatment (different light)
  • Multiple plants per chamber
    • Share the same environment
  • Experimental unit = chamber, not plant
  • One chamber per treatment → no replication
  • Lighting differs between chambers
    • Cannot separate treatment from chamber effect
Illustration of three experimental setups using potted plants with two fertilizer treatments shown by different pot colors. The top row shows one plant per treatment (no replication). The middle row shows multiple plants per treatment grouped into separate chambers (not independent, still unreplicated). The bottom row shows individual plants randomly assigned to treatments and interspersed, representing proper replication with independent experimental units.
Figure 11: Two growth chambers comparing control and treatment conditions, each containing multiple Brassica rapa plants. Because all plants within a chamber share the same environment—and the chambers differ in light intensity—the chamber, not the plant, is the experimental unit. With only one chamber per treatment, this design is unreplicated.

Interspersion signals proper replication

  • Proper replication shows interspersion:
    • Treatments mixed across units
    • Result of random assignment
  • Lack of interspersion:
    • Warning sign of design problems
    • Likely non-independence
Diagram comparing experimental layouts using black and white squares to represent two treatments. The top section labeled “Good design” shows treatments evenly mixed across units (completely randomized, randomized block, and systematic). The bottom section labeled “Poor design” shows treatments grouped or separated, including simple segregation, clumped segregation, isolation in separate chambers, interdependent replicates, and no replication.
Figure 12: Examples of good and poor experimental designs illustrating interspersion of treatments. Top rows show properly interspersed designs (completely randomized, randomized block, and systematic), while bottom rows show problematic designs where treatments are segregated, clumped, isolated, interdependent, or lack replication. Figure from Hurlbert (1984).

Pseudoreplication leads to false precision

  • Treating non-independent units as independent = pseudoreplication
  • Examples:
    • Treating plants within a chamber as separate replicates
    • Repeated measurements on same individual
  • Consequences:
    • Standard errors too small
    • Overconfidence in results

Why replication reduces standard error

\[ \operatorname{SE}_{\bar{Y}_1 - \bar{Y}_2} = \sqrt{s_p^2 \left(\frac{1}{n_1} + \frac{1}{n_2}\right)} \]

  • \(n_1\), \(n_2\) = number of independent replicates per treatment
  • Increasing sample size ↓ standard error
  • Lower standard error → clearer detection of differences

Replication has practical limits

  • Increasing sample size improves inference
  • But comes with costs:
    • Time
    • Money
    • Ethical considerations (e.g., animal use)
  • Goal:
    • Sufficient replication to detect meaningful effects

Balanced designs minimize sampling error

  • Balanced design = equal sample size in each treatment

  • Unbalanced design = unequal sample sizes

  • For a fixed total sample size:

    • Standard error is smallest when group sizes are equal
    • Balance optimizes precision of comparisons
Diagram comparing balanced and unbalanced experimental designs. The balanced design shows equal numbers of units in control (circles) and treatment (squares). The unbalanced design shows many control units and few treatment units, illustrating unequal sample sizes across treatments.
Figure 13: Balanced and unbalanced experimental designs illustrating allocation of sample size across treatments. In the balanced design, control and treatment groups have equal numbers of independent experimental units (n = 6 each). In the unbalanced design, most units are assigned to the control group (n = 10) and few to the treatment group (n = 2). Circles represent control units and squares represent treatment units.

Why balance improves precision

\[ \operatorname{SE}_{\bar{Y}_1 - \bar{Y}_2} = \sqrt{s_p^2 \left(\frac{1}{n_1} + \frac{1}{n_2}\right)} \]

  • For fixed \(n_1 + n_2\):
    • SE minimized when \(n_1 = n_2\)
  • Example (total \(n = 20\)):
    • Balanced: \(n_1=10\), \(n_2=10\) → smaller SE
    • Unbalanced: \(n_1=19\), \(n_2=1\) → much larger SE
  • Estimating a difference requires:
    • Precise estimate of both means
  • Unbalanced design:
    • One group well estimated
    • Other poorly estimated → weak comparison
  • Balance allocates effort efficiently

Balance is optimal but not strictly required

  • Increasing sample size improves precision:
    • Even if added to only one group
  • But for a fixed total sample size:
    • Equal allocation is optimal
  • Additional benefit:
    • Statistical methods are more robust
    • Especially when variances differ between groups

Blocking reduces noise from known sources of variation

  • Blocking: group similar experimental units into blocks

  • Units within a block:

    • Share location or other characteristics
    • Are more similar to each other than to units in other blocks
  • Goal:

    • Remove variation not caused by the treatment
    • Increase precision and power

How blocking works

  • Within each block:

    • Assign treatments randomly
    • Treatments are interspersed within the block
  • Analyze differences within blocks, not across all units

  • Conceptually:

    • Repeat the same experiment in each block
    • Compare treatments under similar conditions
Diagram comparing no blocking and blocking designs. In the no blocking design, all individuals are randomly divided into treatment and control. In the blocking design, individuals are first grouped into blocks, then treatments are randomly assigned within each block.
Figure 14: Comparison of experimental designs with and without blocking. Blocking groups similar individuals before random assignment, allowing treatment comparisons within blocks and reducing variation among groups. Image: JHK111 (CC0 1.0 Universal)

When is blocking useful?

  • Use blocking when:
    • Units differ due to known factors (e.g., location, time, group)
  • Examples of blocks:
    • Field plots in the same area
    • Animals from the same litter
    • Patients from the same clinic
    • Experiments run on the same day
  • Key condition:
    • Units within blocks are similar
    • Blocks differ from each other
Scatterplot of weight loss by individuals without blocking. Blue points represent placebo and green points represent diet pills, with substantial overlap between groups making treatment differences difficult to distinguish.
(a) Without blocking: diet pills vs placebo on weight loss. Individuals are not grouped, so variation among individuals obscures differences between treatments. Image: JHK111 (CC0 1.0 Universal).
Scatterplot of weight loss grouped into two blocks labeled females and males. Within each block, blue points represent placebo and green points represent diet pills, showing clearer separation between treatments compared to the unblocked design.
(b) With blocking: diet pills vs placebo on weight loss. Individuals are grouped into blocks (females and males), and treatment differences are clearer within each block. Image: JHK111 (CC0 1.0 Universal).
Figure 15: Comparison of experimental designs with and without blocking. Without blocking, variation among individuals obscures treatment differences. With blocking, individuals are grouped into more similar subsets, making treatment effects easier to detect within each block.

Example: Extreme treatments reveal nitrogen effects

  • Clark and Tilman (2008) studied whether nitrogen addition reduces plant diversity

  • Typical (background) N deposition: ~1–10 kg N ha⁻¹ yr⁻¹

  • Experimental treatments: Up to 100 kg N ha⁻¹ yr⁻¹ (extreme)

  • Why use extreme levels?

    • Amplify the response
    • Make treatment effects easier to detect
  • Result: Clear decline in species richness with higher N

Scatterplot showing species loss (proportion) versus nitrogen input rate. Points are scattered across increasing nitrogen levels, with fitted lines indicating an upward trend in species loss as nitrogen input increases, especially at higher application rates.
Figure 16: Relationship between nitrogen input and plant species loss in grassland ecosystems. Species loss increases with nitrogen addition, with stronger effects at higher (extreme) nitrogen levels. Points represent observations and lines show fitted trends. Adapted from Clark and Tilman (2008).

Extreme treatments make effects easier to detect

  • Treatment effects are easiest to detect when they are large

  • Small differences:

    • Hard to distinguish from random variation
    • Require larger sample sizes
  • Large differences:

    • Stand out against noise
    • Increase power to detect an effect
  • Strategy:

    • Include extreme treatment levels

Extreme treatments increase power, but with tradeoffs

  • Stronger treatments → larger response differences
    • Higher probability of detecting an effect
  • Useful as a first step:
    • Does this variable affect the response at all?
  • Caution:
    • Effects may not scale linearly
    • Extreme treatments may not reflect realistic conditions
  • Balance:
    • Detection vs realism

Experiments with More Than One Factor

Experiments can include more than one factor

  • A factor:
    • A single treatment variable of interest
  • Many experiments include multiple factors
    • More efficient:
      • Answer multiple questions at once
      • Use time, materials, and effort more effectively
  • Example idea:
    • Temperature + nutrients
    • Light + water
A 2×2 grid showing plant growth under combinations of low and high light and water. Plants are smallest under low light and low water, larger with either factor increased, and largest when both light and water are high.
Figure 17: Factorial design illustrating the combined effects of light and water on plant growth. Each panel represents a different combination of low and high levels of both factors, showing how growth depends on their interaction.

Factorial designs test combinations of factors

  • Factorial design:
    • Includes all combinations of treatment levels
  • Example structure (2 factors):
    • Factor A: A₁, A₂
    • Factor B: B₁, B₂
  • Treatments:
    • A₁B₁, A₁B₂, A₂B₁, A₂B₂
  • Key advantage:
    • Can test interactions between factors
Factorial design: two factors with two levels each
Variable B
B₁ B₂
Variable A
A₁ A₁B₁ A₁B₂
A₂ A₂B₁ A₂B₂
Figure 18: Factorial design with two variables (A and B), each with two levels. Rows represent levels of Variable A and columns represent levels of Variable B. Each cell shows a treatment combination (e.g., A₁B₁), representing one unique combination of factor levels included in the experiment.

Interactions: when effects depend on each other

  • Interaction: Effect of one factor depends on another factor
  • Without interaction:
    • Effects are independent and additive
  • With interaction:
    • Combined effect differs from separate effects
  • Only detectable with factorial design
  • Examples of types of interactions (Duda et al. 2023)
Line graph showing response versus Variable B (B₁, B₂) with separate lines for Variable A (A₁, A₂). The line for A₁ increases from B₁ to B₂, while the line for A₂ decreases, illustrating a non-parallel interaction effect.
Figure 19: Hypothetical interaction between Variable A and Variable B. The effect of Variable B on the response differs depending on the level of Variable A, as shown by the non-parallel lines.

Example: 4-factor factorial experiment (smoking reduction)

  • Study in Cook et al. (2015) Addiction

  • Outcome: % reduction in cigarettes/day

  • 4 factors (2 levels each: yes vs no):

    • Nicotine patch
    • Nicotine gum
    • Motivational interviewing
    • Behavioral reduction
  • Design: 2 × 2 × 2 × 2 = 16 combinations

  • Key idea: Effects depend on combinations of treatments (interactions)

Multi-panel bar chart showing mean percent reduction in cigarettes per day across combinations of four treatments: nicotine patch, nicotine gum, motivational interviewing, and behavioral reduction. Each panel corresponds to patch and motivational interviewing conditions, with bars representing gum and behavioral reduction combinations. Differences among bars indicate that treatment effects depend on combinations of factors.
Figure 20: Mean percent reduction in cigarettes per day for all combinations of four treatments (nicotine patch, nicotine gum, motivational interviewing, and behavioral reduction). Each panel represents a different combination of patch and motivational interviewing, with bars showing gum and behavioral reduction combinations. Results illustrate how treatment effects vary across combinations, indicating interactions among factors. Adapted from Cook et al. (2015).

What if You Can’t Do an Experiment?

When experiments are not possible

  • Use observational studies
    • Researcher does not assign treatments
    • Subjects come as they are
  • Strengths:
    • Detect real-world patterns
    • Generate hypotheses
  • Limitation:
    • Cannot use randomization
    • → greater risk of bias

Observational studies still use good design principles

  • Apply as many experimental design features as possible:
    • Controls
    • Blinding (when possible)
    • Replication, balance, blocking
  • Key missing feature:
    • Randomization
  • Biggest challenge:
    • Confounding variables

Strategy 1: Matching

  • Matching: Pair each treated individual with a similar control
  • Match on known confounders:
    • Age, sex, weight, background, etc.
  • Common in: Case–control studies
  • Benefits:
    • Reduces bias
    • Reduces sampling error (like blocking)
  • Limitation:
    • Only controls known confounders
Grid of human icons arranged in pairs connected by arrows. Each pair matches individuals with the same sex (male or female), race (light or dark shading), and age (with or without a cane), illustrating one-to-one matching on multiple confounding variables.
Figure 21: Illustration of matching in a case–control study. Individuals are paired so that cases and controls have the same characteristics (sex, race, and age), reducing confounding. From Dey et al. (2020) Chest J.

Strategy 2: Adjustment

  • Adjustment: Use statistical methods to control for confounders
  • Example approach:
    • Compare groups at the same value of a confounder (e.g., age)
  • Methods:
    • Regression
    • Analysis of covariance (ANCOVA)
  • Key requirement:
    • Groups must overlap in confounder values
Scatterplot of body mass versus flipper length for Adelie penguins, colored by sex, with separate regression lines for males and females. A dashed vertical line marks a common flipper length, and points on each line at that position indicate predicted body mass for each sex, showing adjusted comparison controlling for flipper length.
Figure 22: Relationship between flipper length and body mass in Adelie penguins, with separate regression lines for males and females. Points show individual observations, and lines show fitted values from a model including sex and flipper length. The vertical line marks a common flipper length, and highlighted points show predicted (adjusted) body mass for each sex at that value, illustrating comparison after accounting for flipper length.

Limits of observational studies

  • Observational studies can reveal important patterns
  • But without randomization:
    • Confounding cannot be fully eliminated
  • Strongest inference:
    • Experiments > observational studies
  • Best use:
    • Identify relationships
    • Generate hypotheses for experiments

Choosing a Sample Size

Choosing a sample size matters

  • Goal: Choose enough samples to get useful results
  • Too small:
    • Cannot detect effects
    • Very wide confidence intervals
  • Too large:
    • Wastes time, money, and resources
    • May raise ethical concerns
  • Key question: How many replicates per treatment?

Two ways to plan sample size

  • Plan for precision
    • Want a narrow confidence interval
  • Plan for power
    • Want a high probability of detecting a real effect
  • Focus here:
    • Comparing two means

Planning for precision

  • Goal: Estimate the difference in means:

\[ \mu_1 - \mu_2 \]

  • Use sample estimate:

\[ \bar{Y}_1 - \bar{Y}_2 \]

  • Want a 95% confidence interval with small width

Margin of error drives sample size

  • Confidence interval form:

\[ (\bar{Y}_1 - \bar{Y}_2) \pm \text{margin of error} \]

  • Margin of error ≈

\[ 2 \times \operatorname{SE} \]

  • Standard error:

\[ \operatorname{SE} = \sqrt{\frac{2\sigma^2}{n}} \]

  • Larger \(n\) → smaller SE → narrower interval

Sample size formula (approximate)

  • Solve for sample size per group:

\[ n \approx \frac{8\sigma^2}{(\text{margin of error})^2} \]

  • Interpretation:
    • Larger variability (\(\sigma\)) → need larger \(n\)
    • Higher precision (smaller margin) → need larger \(n\)

Practical challenge

  • \(\sigma\) is unknown
    • Use:
      • Pilot studies
      • Previous research
      • Educated guess
  • Result:
    • Sample size planning is approximate

Choosing sample size for power

  • Goal: Choose \(n\) so you can detect a meaningful effect
  • You must specify:
    • Effect size (what difference matters biologically)
    • Variability (\(\sigma\); from pilot data or past studies)
    • Significance level (\(\alpha\), usually 0.05)
    • Desired power (commonly 80%)
      • 80% chance of rejecting a false null
      • 20% chance of missing a real effect (Type II error)
  • How you do it:
    • Use software (e.g., R, online calculators)
    • Input these values → solve for required \(n\)
  • Key idea:
    • Larger effect → smaller \(n\)
    • Higher variability → larger \(n\)
    • Higher power → larger \(n\)

More data improves precision

  • Small sample size:
    • Very wide confidence intervals
  • Increasing \(n\):
    • Rapid improvement at first
  • Large \(n\):
    • Diminishing returns
Line graph showing expected margin of error divided by sigma versus sample size per treatment. The curve decreases steeply from small sample sizes and then levels off, indicating that increases in sample size lead to diminishing improvements in precision.
Figure 23: Relationship between sample size per treatment and expected precision of a 95% confidence interval for the difference in means. Precision is expressed as the margin of error divided by σ. Precision improves rapidly at small sample sizes and then more slowly, illustrating diminishing returns.

Diminishing returns

  • Precision improves quickly at first:
    • e.g., \(n = 2 \rightarrow 5\)
  • Then slows:
    • e.g., \(n = 15 \rightarrow 20\)
  • Each additional replicate adds less new information
  • Tradeoff:
    • Precision vs cost

Summary of Considerations in Experimental Design

Summary: Designing studies and making inference

  • Experiments assign treatments and enable causal inference

  • Bias is reduced through controls, randomization, and blinding

  • Randomization balances confounding variables on average

  • Observational studies lack randomization and have weaker inference

  • Confounding in observational studies is reduced by matching and adjustment

  • Sampling error is reduced by replication, balance, and blocking

  • Extreme treatments increase the ability to detect effects

  • Factorial designs test multiple factors and their interactions

  • Sample size is planned for precision or power

  • Study design involves tradeoffs among precision, cost, and feasibility